Von Claudia Ostrop
No question, plain knits can be beautiful. But sometimes, wouldn't it be nice to add a bit more colour?
The simplest way to introduce some colour is through stripes. But why stop there? Today, we'll introduce you to three techniques to knit the most beautiful multicoloured patterns.
Multicoloured Knitting – Fair Isle and Other Classics
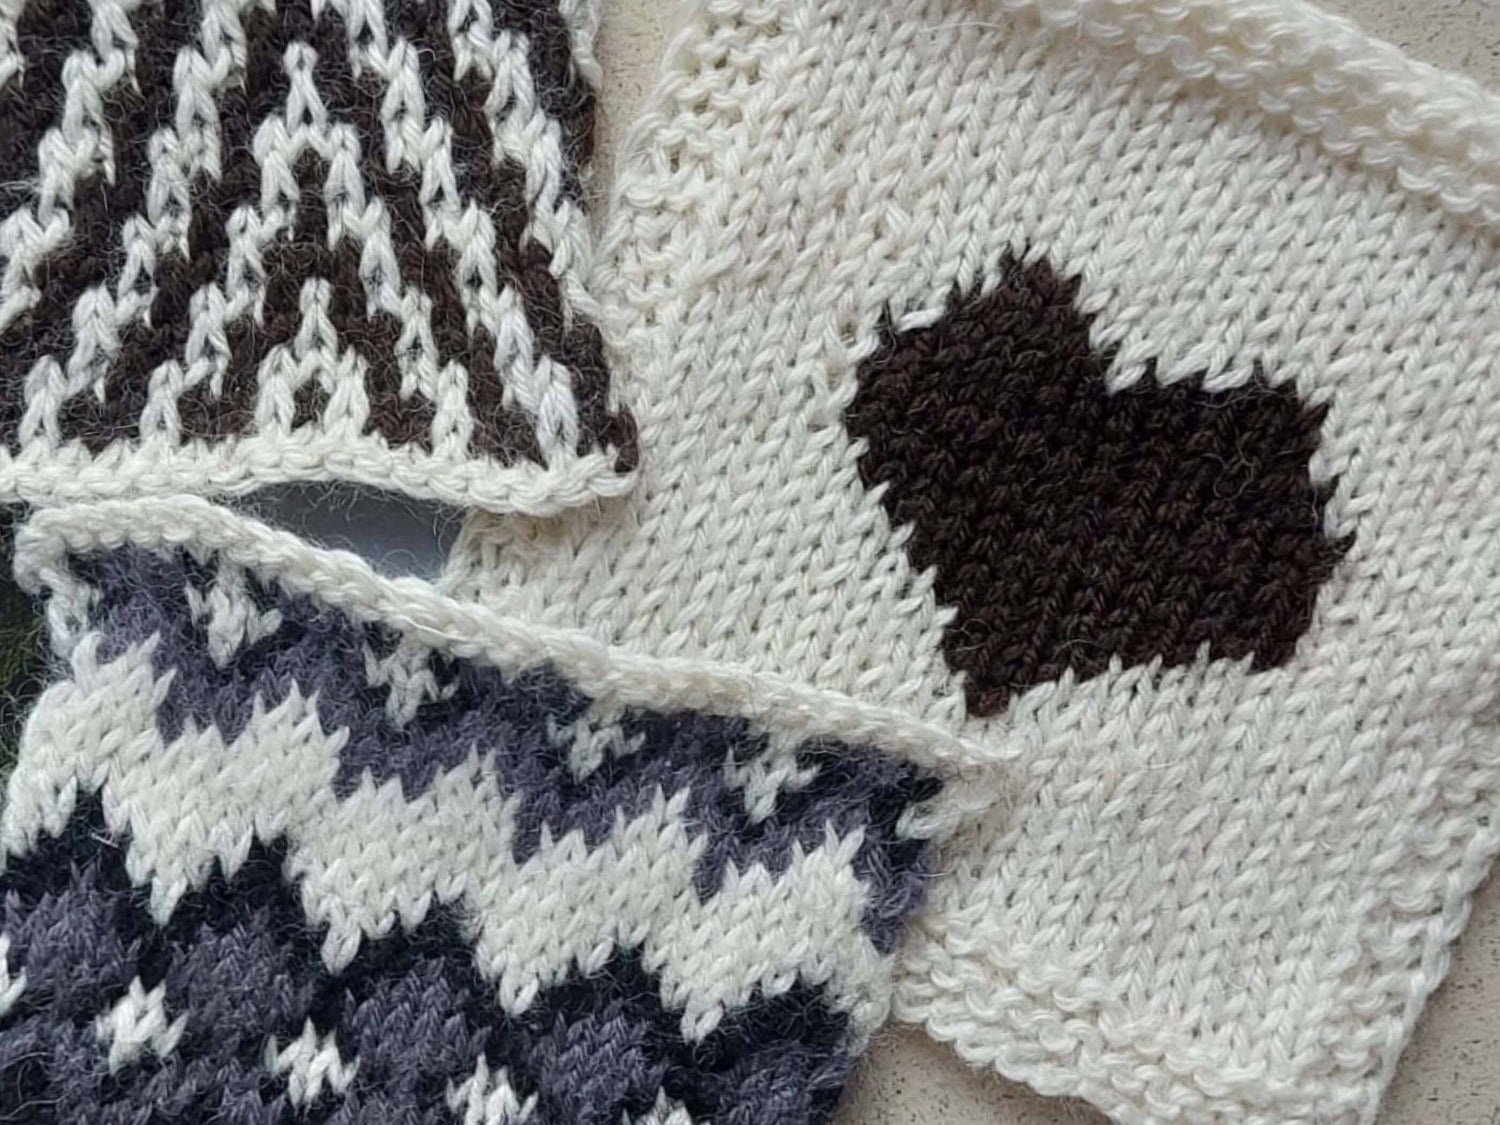
When it comes to multicoloured knitting, one often thinks of those stranded patterns where multiple colours are knit alternately in each round. This is often referred to as Fair Isle, although technically it's the term for a specific type of pattern. Fair Isle patterns originate from the island of the same name off the north coast of Scotland and are essentially narrow patches of patterns combined together. Only a maximum of two colours are used per round. In recent years, Fair Isle has frequently been used synonymously with multicoloured pattern knitting.

Depending on the type of pattern, there are numerous terms for this type of multi-threaded and multi-coloured knitting. Whether it's Norwegian, Jacquard, or, or simply called 'Colourwork' in modern terms, the technique remains the same. The pattern is presented as a graphical chart. According to this chart, stitches are knitted according to the given colours. A colour not currently in use is carried along the back. While the principle is simple, executing it requires some practice. It all starts with knowing how to hold the yarns.
Should you distribute the strands of yarn across different fingers of the left hand? Use a knitting ring? Have one colour in the left hand, the other in the right? Let the unused strand of yarn hang loose? For those hoping for a tip - unfortunately, there isn't one, except for: Experiment! Only through trial and error can each knitter find the most suitable technique for guiding the strands of yarn.
Then comes the question of tension. If the unused strand of yarn is pulled too tightly, the whole fabric will pucker up. If it's carried too loosely on the back, you'll end up with unsightly large stitches on the front and loose loops on the back.

The longer the sections where a colour is dormant, the more difficult it is to maintain even tension. Consequently, it's advisable to intertwine the floating strands with the working yarn on the back or inside of the fabric, ideally after every 5 stitches in a single colour.
Practice is crucial here. It takes time to get used to handling multiple strands of yarn and figuring out how to control the tension so that the multicoloured fabric drapes smoothly and doesn't tighten more than single-coloured areas. It can help to knit patterned areas (e.g., the yoke of a sweater) with a thicker needle than the rest.
In addition to tension, colour dominance is important: In a pattern, there's always a base and contrast colour(s). The pattern colour should ideally stand out a bit, not just in terms of colour but also dimensionally: If the stitches of the contrast colour are slightly larger and more raised, the pattern will stand out more.
How does this work?
Actually, it's quite simple. When knitting with two colours, one of the colours runs on the back of the fabric until it's needed again. During this change, one strand is over or under the other. While the top strand goes directly to the next stitch of its colour, the bottom one takes a slight detour on the way to the next stitch: It goes down a bit before running diagonally and then up again to the next stitch. Some of the additionally used yarn will pass into the stitch, causing the stitches of the bottom strand to automatically become slightly larger. Hence the dominance of this colour - the pattern stands out more from the background.
Because 'Colourwork' with purl stitches and the carried strqands of yarn in front of the work wouldn't be fun at all, this type of pattern is always knitted in rounds - meaning only knit stitches, and the floats are always on the back or inside of the fabric. And if the project is intended to be a cardigan in the end? Quite simple, it just takes a bit of courage... the magic word is Steeking, a shortcut used to knit garments such as sweaters in the round without interruption for openings or sleeves until the end. Initially, it's knitted in rounds (like for a sweater), but a seam is inserted where the 'tube' will later be cut open. More on that another time.
If you want to try multicoloured knitting with multiple yarns, you might start with our sweet hat Suki. And for those who want to knit a truly impressive pattern, our sweater Bonaire is recommended. Practice makes perfect!

Knitting Intarsia
In the 1980s, there was a fashion trend characterised by large inlay motifs on sweaters. Whether they featured laughing cats, bright red fire trucks, or rainbows, the key was to be colourful and eye-catching!
With the revival of knitting enthusiasm, intarsia knitting has also found its fans again, and even though the motifs are different today, the technique has remained the same.

Intarsia: In contrast to the above-described patterns, no strands of yarn are carried over here. Each colour area consists only of that respective colour. This keeps the fabric beautifully soft. Fair Isle & co. always make the knitted piece a bit sturdier. So how does it work? The secret lies in many small balls of yarn gathered at one time. As soon as a new colour area starts, a new small ball of yarn is used. At the colour change, the two colours are intertwined to avoid holes. To prevent a wild tangle of yarn after just a few rows, it's advisable not only to wind the colours but also to secure the end of the currently unused yarn. For example, wrap the yarn around a piece of cardboard and cut a slit as a thread brake so that the yarn doesn't unwind when the colour is on pause. Or wind it onto a clothespin and clamp the yarn there.
While the patterns described in the previous section only work in rounds, intarsia knitting only works in rows. After all, the yarn remains at the end of the respective colour area. So you have to knit back and forth to always have the yarn where you need it. But if you still don't want to knit in separate pieces, you can easily manage the intarsia area: For example, if you're knitting a sweater in rounds, you can insert a turning point at one side - preferably under the arm - and practically knit back and forth as with short rows. Once the pattern is finished, continue knitting in rounds as usual.
Feeling inspired? Then check out the fantastic Orchideja sweater!

Mosaic Knitting
Mosaic knitting is another way to achieve beautiful effects with two or more colours - and all without a tangle of yarns! The secret of this technique lies in slipped stitches, which are slipped over one or more rows or rounds.

Only one colour is knitted per round or row. When lifting stitches from the previous row/round after a colour change without knitting them, you have the previous colour in the midst of the stitches in the new colour. And all this without floats on the back. By playing with whether you lift stitches multiple times, whether you carry the yarn in front or behind the work, or simply by switching between knit and purl stitches - with the mosaic technique, you can easily achieve impressive effects. The slipped stitches also create a beautiful texture in the fabric.
By the way, the pattern for the Siliana loop offers a delightful introduction to mosaic knitting.

We hope we've spiked your curiosity about multicoloured knitting. Whether you're eager for a challenge or prefer a simpler approach for beautiful results, there are guides suited to every taste. And with our shop offering a diverse selection of yarns, your multicoloured knitting projects are bound to flourish effortlessly!


